Who wouldn’t swoon over a KitchenAid stand mixer? The sleek design, the power it offers in the kitchen, and the prestige associated with it make it a coveted appliance for any cooking enthusiast.
However, the hefty price tag of $300-600 can be quite daunting for many of us. I’ve always had my eye on one ever since my past roommate received it as a Christmas gift, leaving me feeling a tad bit envious. But, like they say, where there’s a will, there’s a way!
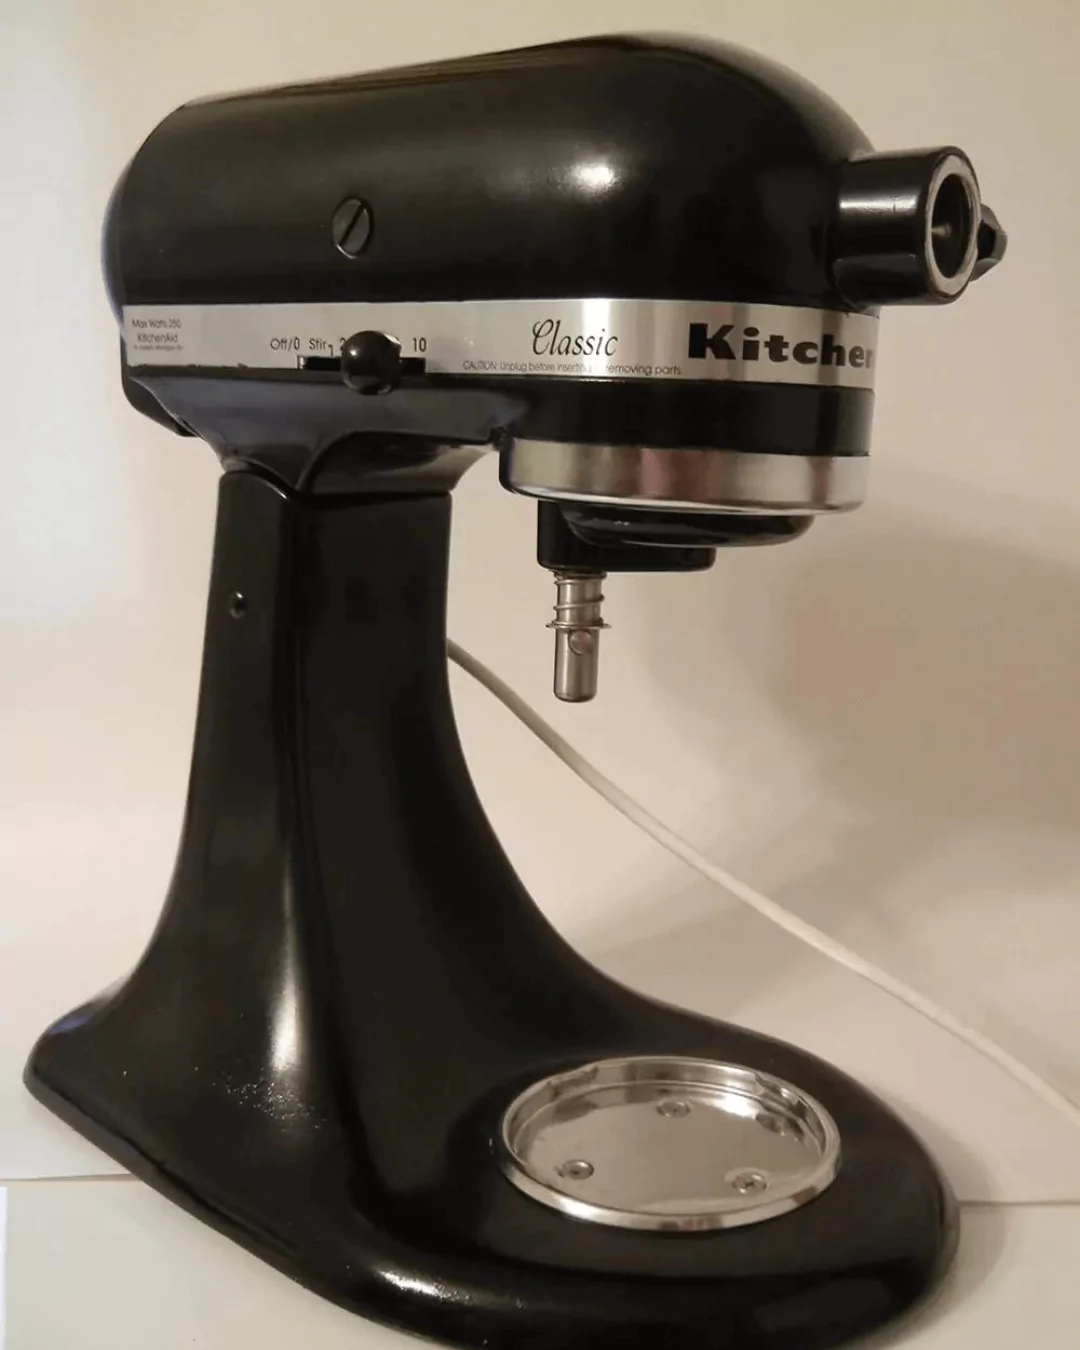
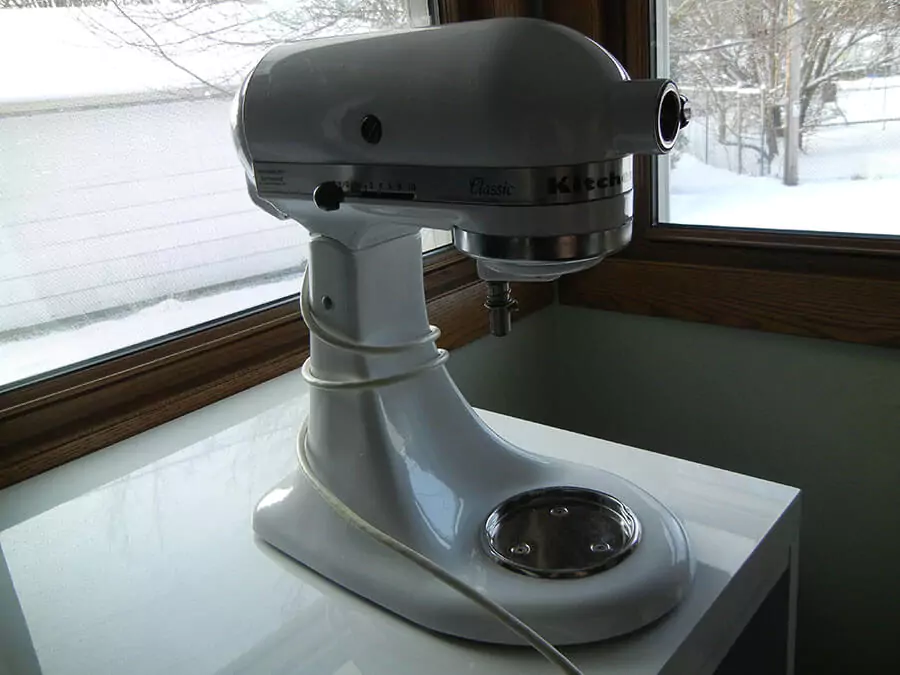
My quest to own a KitchenAid mixer began when I stumbled upon a promising deal on eBay. There it was – a slightly blemished, yet perfectly functional, white KitchenAid mixer listed for only $56. With my excitement levels soaring high, I couldn’t resist making it mine. However, I wanted to add a personal touch and make it fit my kitchen decor, and that’s when I stumbled upon an ingenious tutorial on You Craft Me Up.
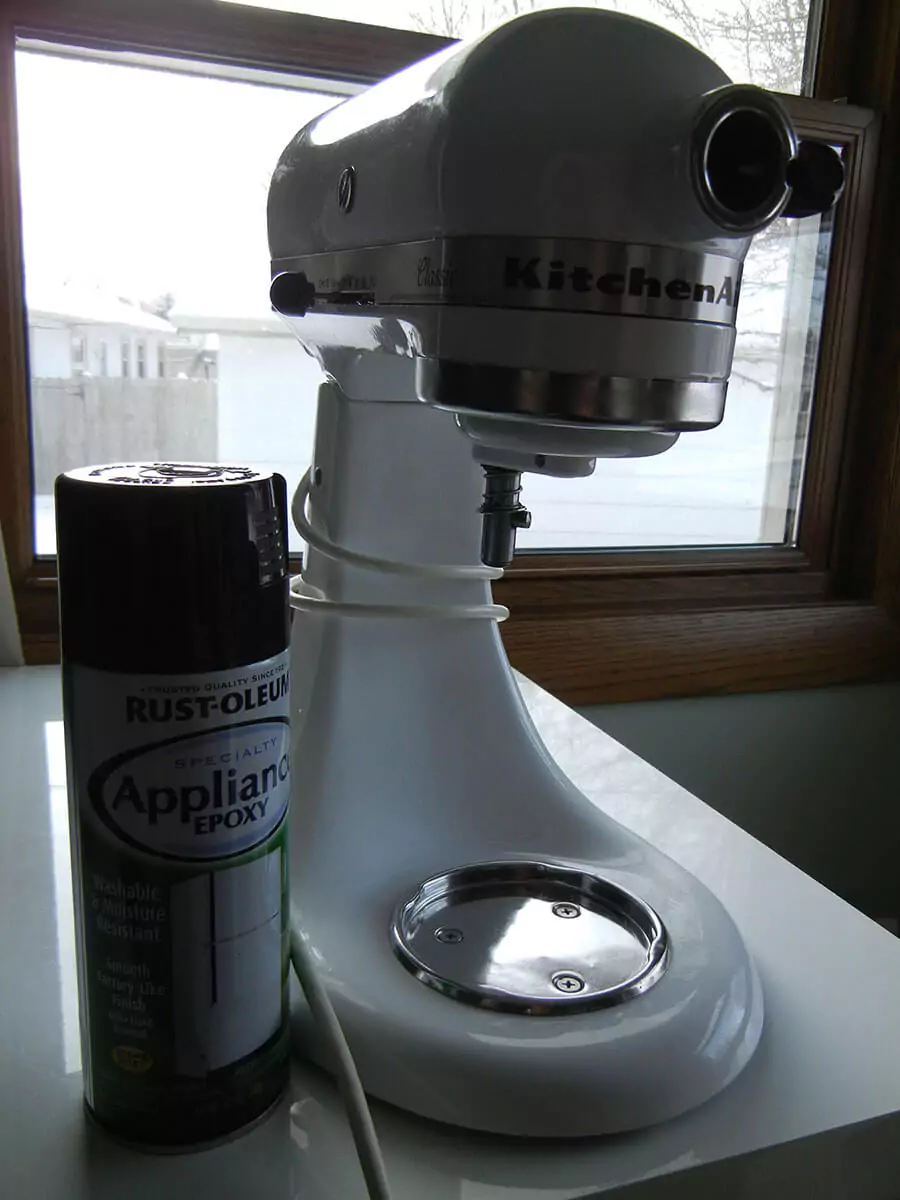

I decided to go for a glossy black look using Rustoleum Appliance Epoxy from Home Depot, which I believed would effortlessly cover up those minor imperfections. Before starting the painting process, I meticulously covered all the chrome parts with painter’s tape, and then carefully unscrewed the metal plate and back cover piece.
However, as with any DIY project, challenges were bound to come my way. I soon discovered that the mixer I bought was far from clean, with remnants of the previous owner’s kitchen escapades still lingering on it. I was appalled, but undeterred. I wrapped the cord and electronic parts securely in a plastic bag, ready to tackle the task of giving my mixer a fresh, new look.
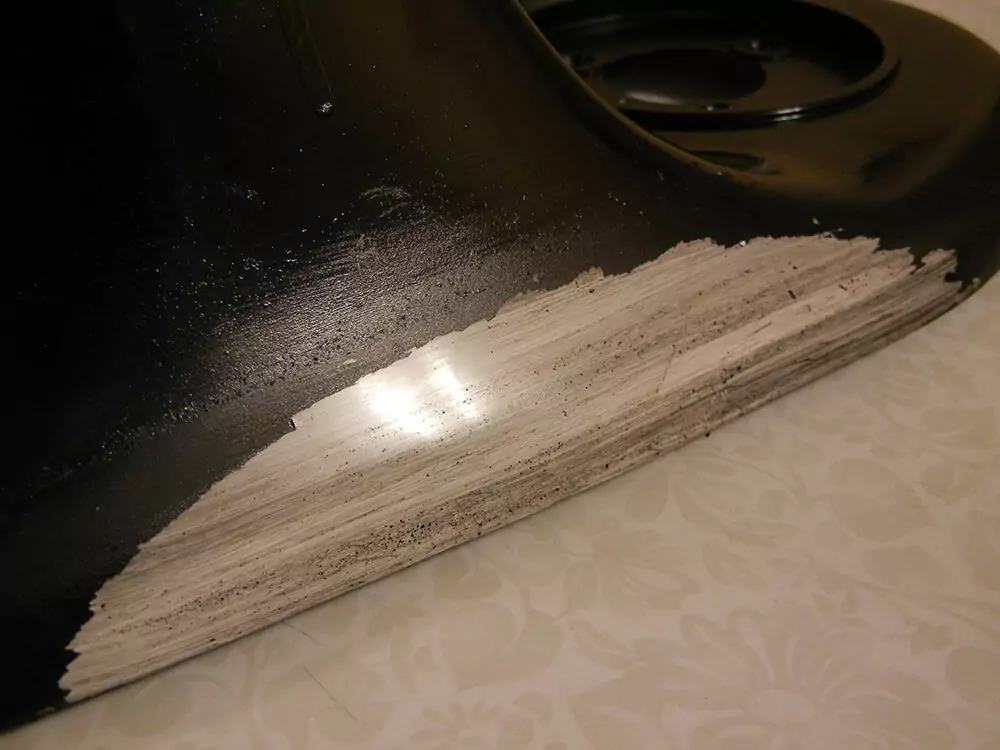

But the road to perfection is never without a few bumps, right? During the first two coats of paint, I noticed some bubbling and easy wiping off, leaving me puzzled. It turned out there was some leftover adhesive or cleaning residue, which I diligently removed with nail polish remover and a thorough wash. Then, I re-applied another two coats, determined to make it flawless.

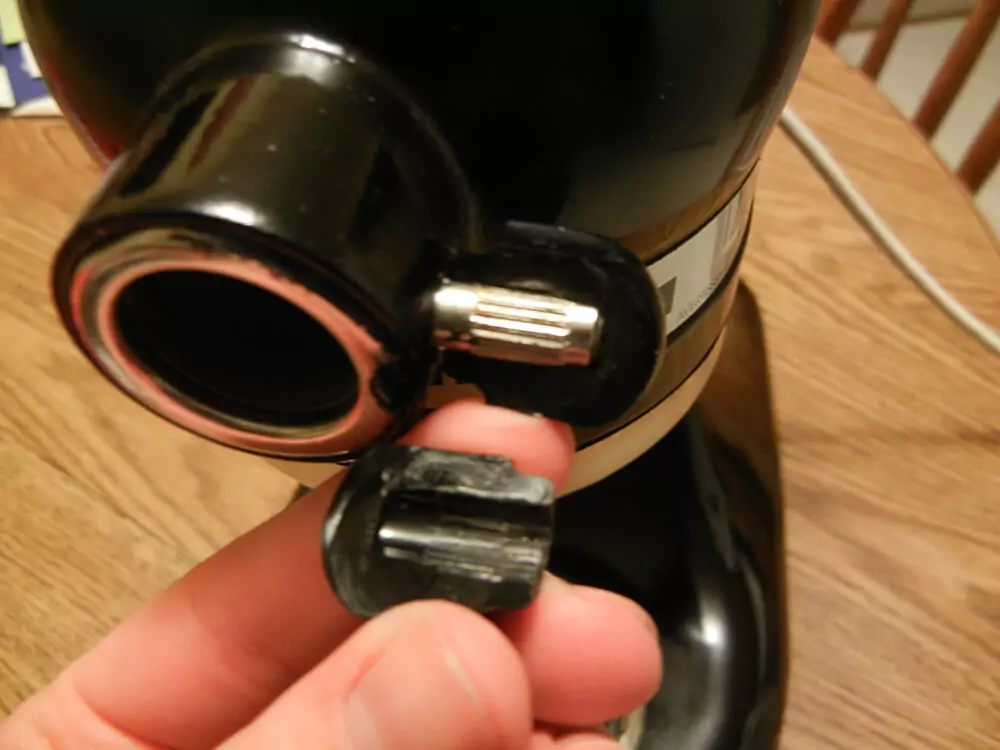
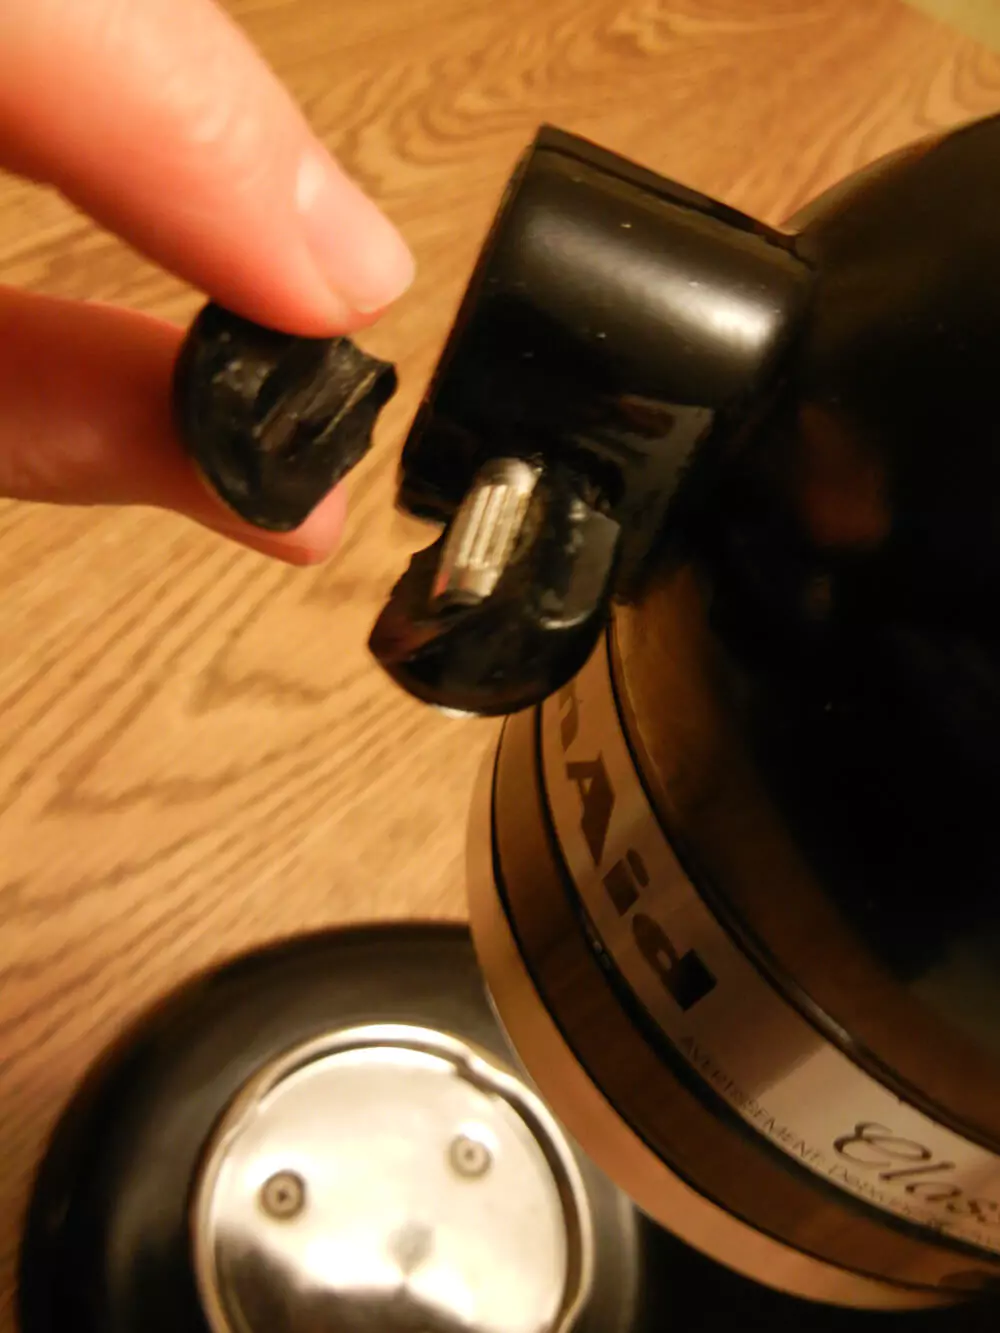
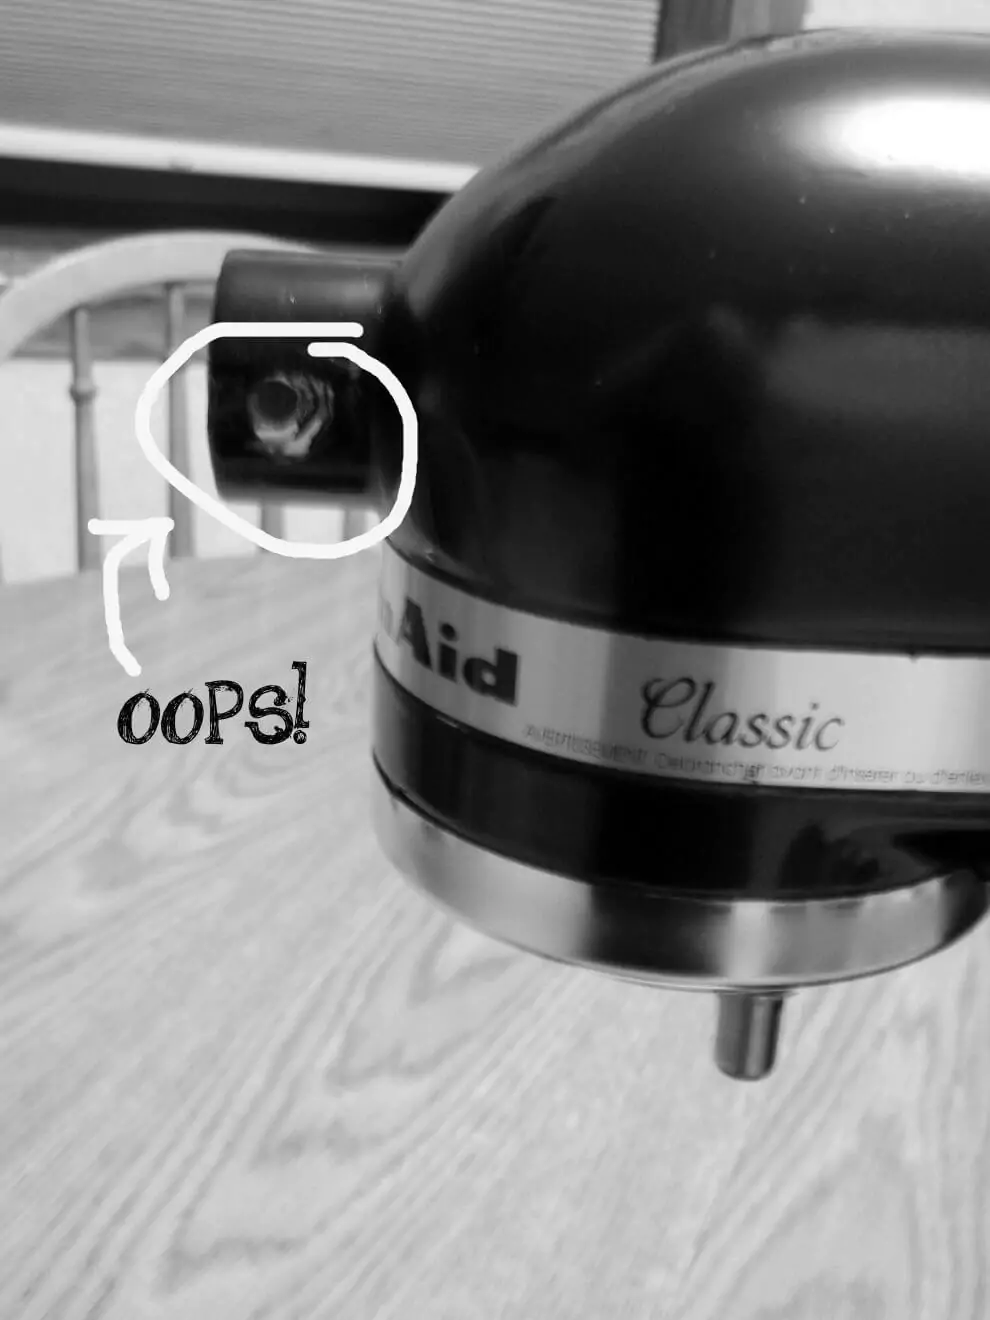
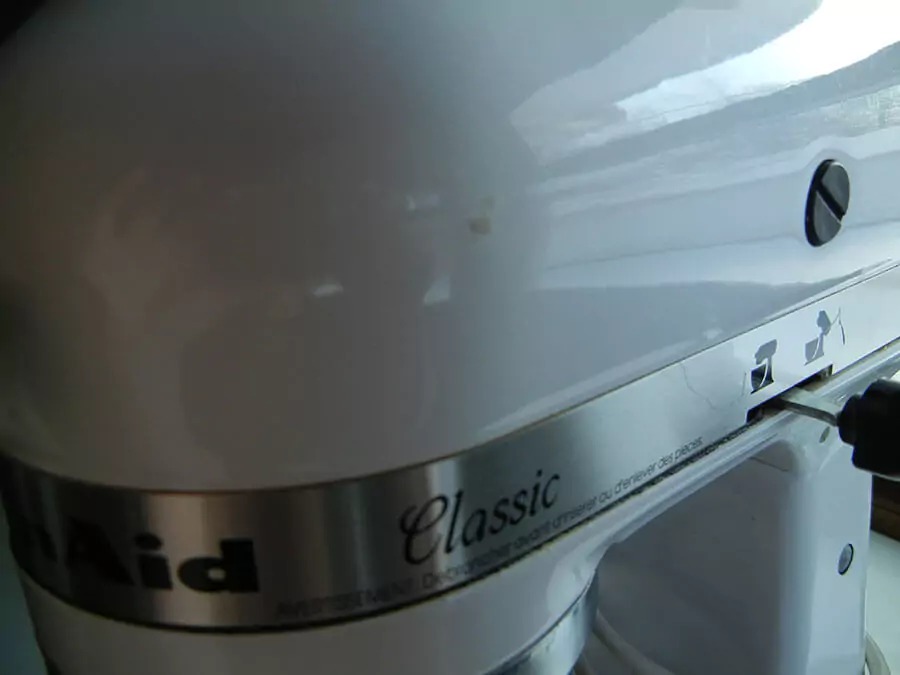
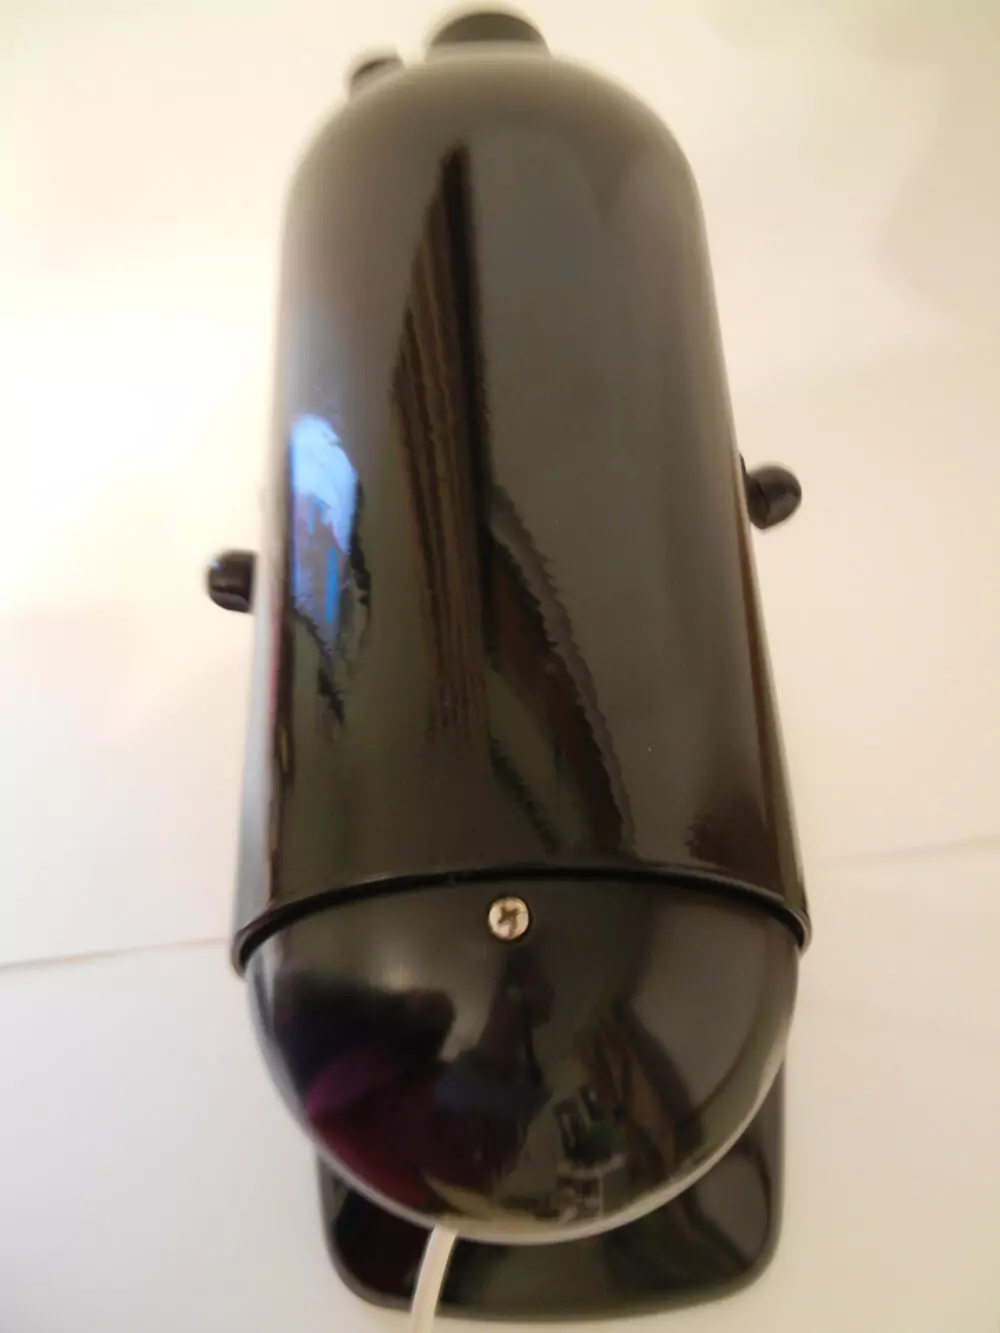
While taping a certain part of the mixer, it unexpectedly split into two, indicating possible previous damage from the previous owner or during shipping. But I wasn’t ready to give up. Gorilla Glue came to the rescue, and after some quick fixes, I was back on track. As it turns out, I also missed painting underneath this specific area, but that pesky screw would always be there to cover up my minor oversight.

The project took me about a week to complete, mainly because I worked on it bit by bit each day. Cleaning the mixer was quite a task, but I knew it was necessary for a polished finish. Though I encountered a few mishaps, like paint drippings and small mistakes, I was proud of my efforts. Yes, I might not be a professional spray painter, and perhaps I could use some lessons in the craft, but the end result was worth every moment of perseverance.
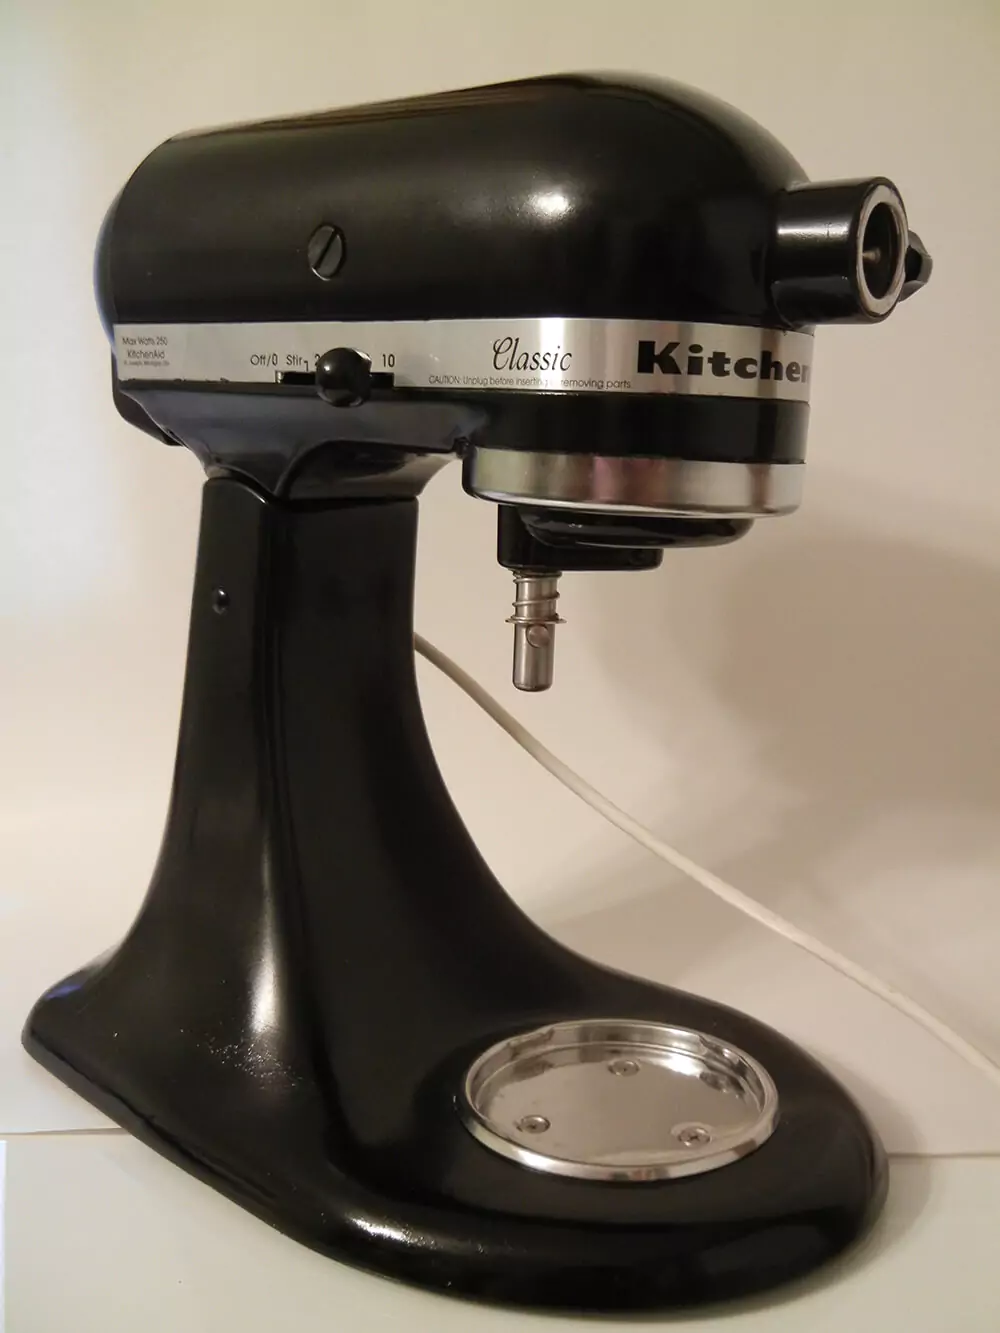

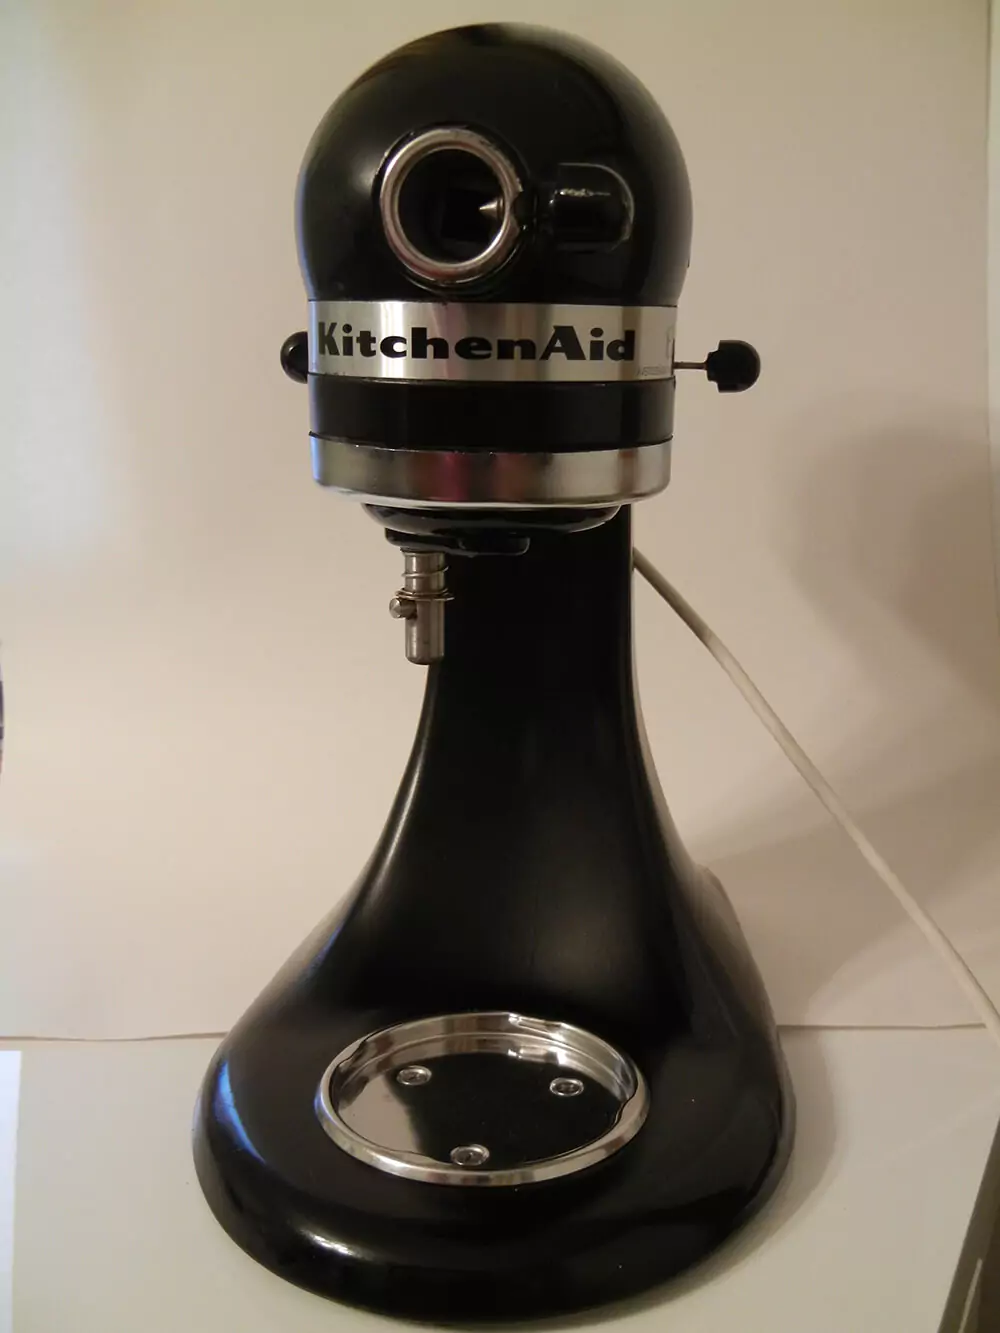
After about four or five coats, my KitchenAid mixer had undergone a breathtaking transformation. The glossy black finish breathed new life into it, making it a perfect fit for my kitchen decor. I couldn’t help but admire my handiwork, and every time I use it, it fills me with immense satisfaction and joy.
Owning a KitchenAid mixer has been a dream come true, and now that it bears my personal touch, it feels even more special. So, if you’re eyeing one for your kitchen but are hesitant due to the cost, consider exploring secondhand options or even upcycling and customizing one to make it uniquely yours. It might take a little extra effort and patience, but the rewards are truly priceless. Happy mixing, baking, and creating delightful culinary wonders with your very own KitchenAid masterpiece!
Cheers,
Katie
You can find more DIY posts here.